
Few brewers look as unassuming as the AeroPress. It is two plastic cylinders, a rubber-sealed plunger and a cap that holds a paper filter — no element, no pump, nothing to plug in. Yet this odd little device, released in 2005 by Alan Adler, the Stanford engineer behind the Aerobie flying ring, has built a following that borders on devotion. There is even a World AeroPress Championship, running since 2008, where competitors from dozens of countries argue over water temperature and stirring technique.
The loyalty makes sense once you taste what it does. The AeroPress brews by steeping coffee in hot water and then using gentle air pressure to push it through a paper filter. That combination — part immersion brew, part pressure — gives you the full, rounded body people love in a French press, but with the clean finish of a filtered cup and none of the gritty sediment at the bottom. It is not espresso, despite what the box implies, and it is not a press pot either. It is its own thing: a fast, forgiving brewer that makes a concentrated coffee you can drink short and intense or top up with hot water, Americano-style.
What You Need
- An AeroPress brewer (chamber, plunger, filter cap, scoop and stir paddle are usually in the box)
- AeroPress paper micro-filters
- Fresh coffee, ground medium-fine
- Hot water, plus a kettle to heat it
- A sturdy mug or server the chamber can sit on
- A kitchen scale, if you want repeatable results
The Coffee and the Water
The classic AeroPress recipe builds a small, strong brew and then dilutes it, so the dose is generous: around 20 to 22 grams of coffee for a 16-ounce mug once topped up. That is roughly two of the scoops included in the box. Scoops are convenient, though they are not precise — how much a coffee scoop actually holds shifts with the coffee and how heaped the scoop is, which is why a small scale is worth having if you brew this way often.
Grind finer than you would for drip but coarser than espresso — somewhere in the medium-fine range, like coarse sand. Too coarse and the water rushes through thin and sour; too fine and the plunge becomes hard work.
Water temperature is where AeroPress drinkers split into camps. Adler himself recommends surprisingly cool water, around 175°F (80°C), arguing it makes a sweeter, less bitter cup. Many modern recipes run hotter, up to just off the boil, especially for light-roasted beans. Both work. Start near 185°F if you want a middle path, then adjust to taste. And because the brew is concentrated before dilution, its caffeine lands accordingly — if you are curious how that compares spoon for spoon, we have broken down the caffeine in a tablespoon of coffee elsewhere on the site.
Brewing, Step by Step
1. Set the filter
Drop a paper filter into the black filter cap and rinse it under the tap or with a splash of hot water. The rinse washes away any papery taste and helps the filter stick to the cap so it doesn’t shift later. Twist the cap firmly onto the bottom of the brewing chamber.
2. Chamber on the mug, coffee in
Set the chamber, filter side down, on top of your mug. Add your ground coffee — the funnel in the box keeps grounds off the counter, though a careful pour works fine without it. Give the chamber a gentle shake so the bed of coffee sits level.
3. Add water and stir
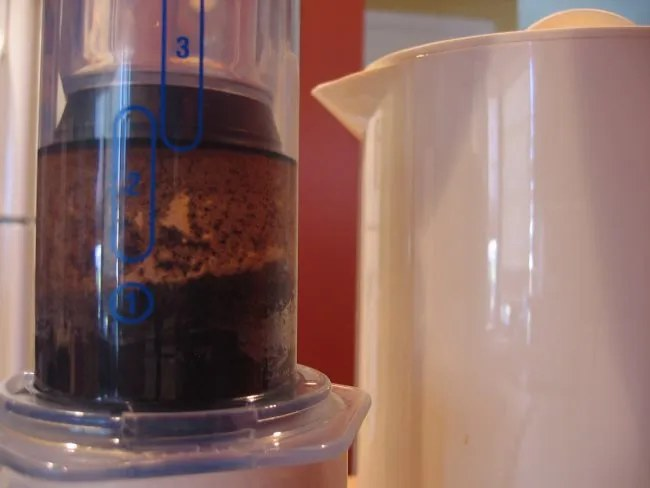
Pour in a little hot water first, just enough to wet all the grounds, and stir with the paddle so everything is saturated. Then add the rest of the brewing water up to the top marking — near the number 2 on the chamber for a diluted mug. Let it steep for about ten seconds more and stir once again.
4. Plunge slowly
By now the total brew time should be somewhere between 45 and 90 seconds. Set the plunger into the top of the chamber and press down with slow, steady pressure — think resting the weight of your arm rather than forcing it. You will feel resistance build as the coffee compacts. Press until the plunger reaches the grounds and you hear a soft hiss of air. That hiss is your cue to stop; pushing past it squeezes bitter flavors out of the puck.
5. Top up and drink
Lift the brewer off the mug. What is in the cup is a concentrate, so add hot water until you reach your full 16 ounces, taste, and adjust. Prefer it stronger? Dilute less next time, or skip the top-up entirely and drink it short.
Cleanup Takes Ten Seconds
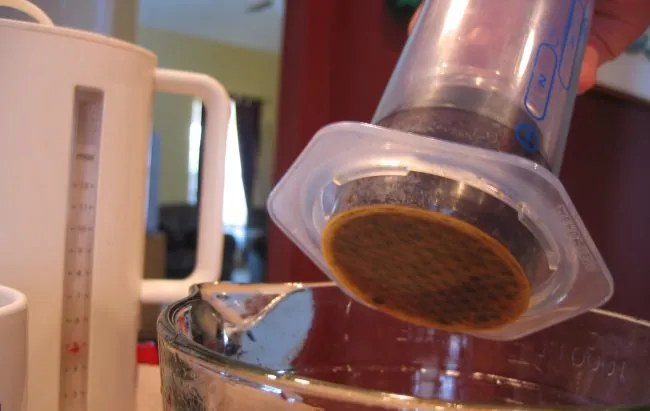
Cleanup is the AeroPress’s party trick. Unscrew the filter cap over a bin, then push the plunger the last bit of the way. The spent grounds pop out as a neat, dry puck, filter and all. A quick rinse and the brewer is ready to go again — no grounds clinging to mesh screens, no oily residue to scrub.
Worth Trying Once You’ve Got the Basics
The most popular variation is the inverted method: you assemble the brewer upside down, plunger first, steep the coffee without anything dripping through, then flip the whole thing onto your mug and press. It gives you full control over steep time and is the method most championship recipes use. Beyond that, the AeroPress rewards small experiments — a longer steep for sweetness, a second filter for an even cleaner cup, a finer grind for a shorter, punchier brew. Change one thing at a time, write down what worked, and within a week you will have a recipe that is entirely your own. That, more than anything, is why this strange plastic tube has outlasted so many fancier machines.
2 Comments