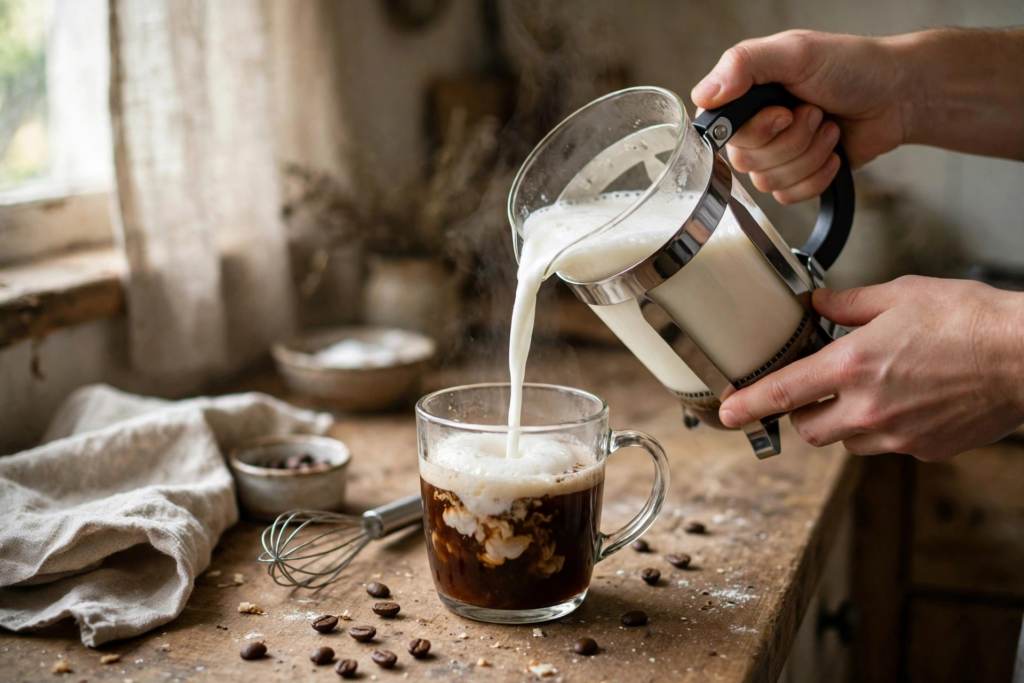
A latte is, at heart, a simple drink: concentrated coffee softened by a lot of hot, textured milk — roughly one part coffee to three parts milk, with the milk stretched into a silky microfoam rather than a dry cappuccino cap. The espresso machine does two jobs in that equation: it makes the concentrated base, and its steam wand textures the milk. Neither job actually requires the machine. What requires the machine is doing both at café speed. At home, on a quiet morning, you can do both yourself — you just need the right substitutes and an honest sense of which ones actually work.
The Honest Truth About Substitutes
Let’s set expectations before the how-to. A latte made with a moka pot base and French-press-frothed milk will not taste identical to one from a good café. What it will taste like is a genuinely good, creamy, coffee-forward milk drink — closer to the real thing than most people expect, and better than a surprising number of actual cafés manage. The methods below are ranked by how close they get, and I’ll tell you plainly where each one falls short.
The Coffee Base: Four Options, Ranked
1. The moka pot — closest to the real thing. A moka pot brews the strongest, most concentrated coffee of any stovetop method, with a heavy body that stands up to milk the way espresso does. Use a fine-ish grind, brew it well (our moka pot guide and the refined stovetop masterclass cover this properly), and use about 80–100 ml per latte. This is the base I’d hand to a skeptic. Its only real deficit versus espresso is the lack of crema — the milk covers most of that.
2. AeroPress concentrate — the precision pick. Brewed inverted with a fine grind, a short steep, and minimal water (around 18–20 grams of coffee to 80–100 ml of water), the AeroPress produces a clean, sweet concentrate with real intensity. It’s less heavy-bodied than moka pot coffee but more refined — some tasters actually prefer it in milk. If you own an AeroPress, this is your move; the full method is in our AeroPress tutorial.
3. Double-strength French press — the one you already own. Use roughly twice your normal coffee-to-water ratio and a four-minute steep, then press and pour off immediately so it doesn’t keep extracting. It works — the coffee is strong enough to survive the milk — but it’s the least concentrated of the real options, and the brew’s heavier sediment shows through. Fine for a daily drinker, not the pick for impressing anyone.
4. Instant espresso powder — the honest shortcut. Dissolved in a small amount of hot water, instant espresso makes a serviceable base with real coffee flavor and zero equipment. What it lacks is body and aroma; the result tastes like a latte the way a photograph tastes like a meal — recognizable, but flat. Keep a jar for rushed mornings, but don’t mistake it for the good stuff.
What doesn’t work: regular drip or pour-over coffee, even “strong” drip. It’s simply too dilute — by the time you add 200 ml of milk, the coffee has vanished. Cold brew concentrate is strong enough but its low-acid, chocolatey profile makes a dull hot latte. Use the right tool for the drink.
The Milk: Temperature First, Foam Second
Most home latte failures are milk failures, not coffee failures. Two numbers matter: heat the milk to 55–65°C (130–150°F) — hot enough to drink, cool enough that the milk sugars stay sweet. Past 70°C, milk proteins denature and the whole thing tastes flat and scalded, no matter how good the foam looked. If you don’t have a thermometer, pull it off the heat when it’s steaming and too hot to hold your finger in comfortably. And use whole milk if you can; the fat is what makes microfoam stable and sweet. Oat milk is the best non-dairy substitute for frothing; almond and skim are noticeably harder to work with.
Now the frothing, from best method to last resort. What you’re after in all of them is the same thing a steam wand does: incorporate a little air, then break the bubbles small by swirling, until the milk looks like wet paint — glossy, with no visible bubbles.
The French press method — the home gold standard. Heat the milk, pour it into a clean French press (no more than a third full), and pump the plunger up and down vigorously for about thirty seconds. The mesh screen does exactly what a steam wand’s tip does: it shreds big bubbles into tiny ones. Let it rest a moment, swirl, and pour. This is the only home method that produces something a barista would recognize as microfoam.
The handheld frother — fast and decent. A ten-dollar battery whisk, milk heated in a tall cup, thirty seconds of buzzing with the head just under the surface. You get real foam, though coarser and less integrated than the press method. Tilt the cup and keep the frother moving to break the big bubbles.
The mason jar shake — the no-equipment classic. Half-fill a jar with warm (not hot) milk, seal it, and shake hard for thirty to sixty seconds until it doubles in volume. Then microwave it uncovered for thirty seconds — the heat stabilizes the foam. The texture is airier and more cappuccino-like than a true latte’s, but spooned over strong coffee it’s genuinely enjoyable.
A whisk and a saucepan — the honest minimum. Heat the milk while whisking vigorously. You’ll get some foam and warm milk, which is, functionally, most of a latte. Nobody will photograph it, but it tastes fine on a Tuesday.
Putting It Together: The Pour
Brew your base into a wide mug — wide matters, because you’re about to pour milk into it with some control. Pour the textured milk in a steady stream, holding back the foam with a spoon at first so the liquid milk mixes with the coffee, then spooning or pouring the foam over the top for the finish. The classic ratio is about one part coffee to three parts milk: for a 12-ounce mug, that’s roughly 3 ounces of concentrate and 9 ounces of milk.
Two details that separate a good home latte from a milky coffee: pour the milk promptly (foam starts separating within a minute), and give the milk pitcher or press a firm swirl and a tap on the counter before pouring to pop any large surface bubbles. That’s the entire secret of the glossy finish — it’s bubble management, not artistry.
The Iced Latte Shortcut
Iced lattes are actually easier without a machine, because there’s no milk to texture. Brew your concentrate — moka pot or AeroPress both work — let it cool for a minute, then pour it over a tall glass of ice and add cold milk to fill. Stir. The one rule: brew the concentrate strong (a 1:6 to 1:8 ratio), because the melting ice dilutes everything. A splash of simple syrup or vanilla goes in before the milk so it actually dissolves.
Flavor Variations Worth Making
Once the base drink works, flavoring is trivial: stir a tablespoon of simple syrup into the hot coffee before adding milk. Vanilla is the classic; a spoonful of cocoa powder whisked into the concentrate makes a mocha; a pinch of cinnamon or a dash of cardamom in the grounds before brewing gives the whole drink a spiced depth that syrups can’t. Avoid the flavored instant “latte mixes” — they’re mostly sugar and powdered creamer wearing a coffee costume.
None of this replaces a real espresso machine, and it isn’t trying to. What it does is put a genuinely good latte within reach of a stovetop and a French press — which, for most kitchens, is the whole point. If you ever do taste the machine-made original for comparison, our guide to pulling the perfect espresso shot will tell you what the barista is actually doing behind the counter.