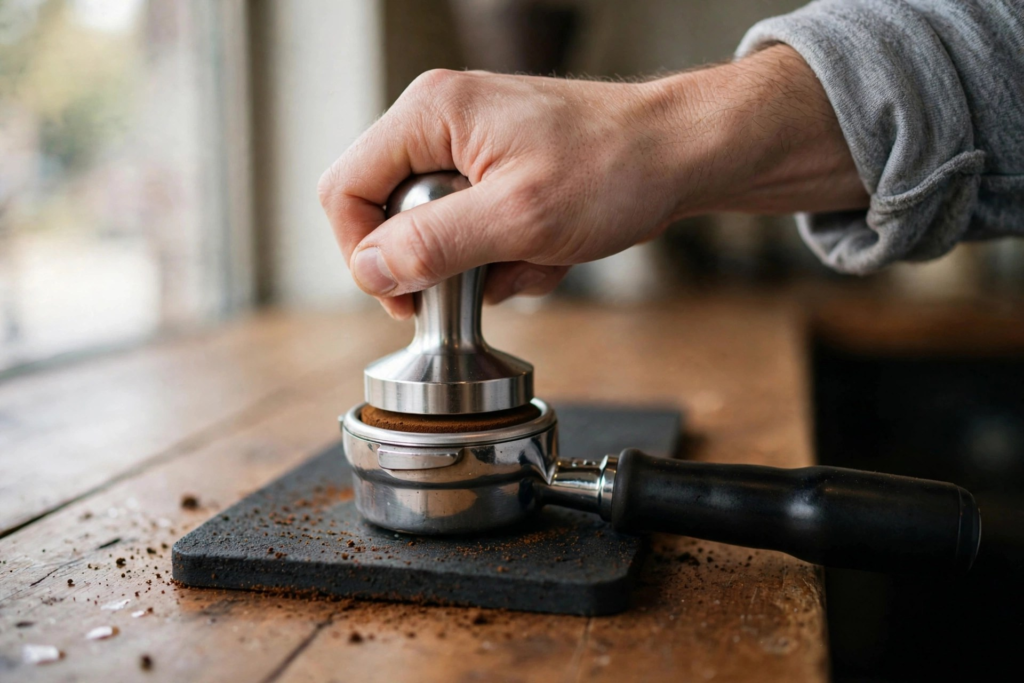
Tamping takes about three seconds, and it is the most misunderstood three seconds in all of coffee. New baristas obsess over it. Experienced ones barely think about it. The truth sits somewhere between: the tamp is a small act with an outsized job, and getting it right removes one of the biggest sources of inconsistency in home espresso.
To tamp is simply to press the ground coffee in the portafilter basket into a flat, even puck before brewing. That is all. But that compacted bed of coffee is what the machine’s nine bars of pressure push hot water through, and if it is uneven, the water will cheat. It always cheats. Understanding why is what makes the technique stick.
Why the Tamp Matters More Than You Think
Water is lazy. Given a choice between flowing through densely packed coffee and slipping through a loose patch, it takes the loose patch every time. When that happens, the channels of fast-moving water over-extract the coffee around them while the surrounding grounds under-extract — a phenomenon called channeling. The result is a shot that is somehow sour and bitter at once, thin where it should be syrupy, muddled where it should be clear.
A good tamp does not fix a bad grind, a wrong dose, or stale beans. It cannot. What it does is remove itself as a variable, so that when something is off in the cup, you know where to look. Think of it as the last link in the chain of puck preparation: grind, dose, distribute, tamp. Every link before it has to be right for the tamp to matter, and when they are, the tamp is what lets them all work.
The Gear You Actually Need
You need less than the internet suggests. A tamper that fits your basket is the non-negotiable item. The standard commercial size is 58 millimetres, but smaller home machines use 51, 53, or 54 — measure the inside of your basket or check the manual. The tamper should drop in with an even hairline gap all around, never wedging or tilting. The cheap plastic tamper that came in the box will teach you the motion, but a weighted metal one with a flat base will teach you consistency, and it is worth the small investment.
A tamping mat or any clean, flat, stable surface keeps the portafilter from wobbling while you press. A kitchen scale, used to weigh your dose before tamping, quietly does more for repeatability than any accessory with a brand name on it. That is the whole kit: tamper, mat, scale.
Step One: Start With a Clean, Dry Basket
Knock out yesterday’s puck and rinse the basket, then dry it. A film of old coffee oil or a few beads of water on the metal will change how the grounds sit and how the water behaves, and at espresso’s scale of precision, that is enough to matter. Between shots during a session, a quick rinse and wipe is plenty; once in a while, soak the basket and portafilter in a dedicated espresso detergent to strip the accumulated oils.
Step Two: Dose and Distribute the Grounds
Grind directly into the basket or pour the grounds in from a dosing cup. A standard double basket typically holds around 18 grams — single baskets take roughly half that, triples around 21 — but basket capacities vary, so treat these as starting points and let your basket’s behaviour be the judge. Dosing by weight rather than by eye removes one of the great quiet variables in espresso, because ground coffee changes density with grind size and roast level.
Before you touch the tamper, the bed must be level. Tap the portafilter gently against the counter to settle the grounds, then draw a finger across the top to even them out. If you see clumps — and you will, especially with darker roasts — break them apart with the tines of a fine needle tool, the little device the internet calls a WDT. This step takes seconds and does more for preventing channeling than tamping harder ever will.
Step Three: Press Straight Down, Level and Even
Rest the portafilter on your mat so the basket sits flat. Grip the tamper the way you would grip a doorknob — handle settled into your palm, fingers wrapped around the base — and stand so your forearm lines up behind it, elbow roughly above the tamper. The point of the posture is simple: you want to press with your body weight through a straight wrist, not lever with your hand. A bent wrist is how tilted tamps happen.
Lower the tamper onto the grounds and press down in one smooth motion until the puck stops compressing. Then stop. There is a famous guideline — about thirty pounds of pressure, roughly fourteen kilos, famously demonstrated by pressing a tamper on a bathroom scale — and it is a fine place to start. But modern barista thinking has moved on from treating the number as law. Once the puck is fully compressed, pressing harder barely changes the flow. What changes the shot is whether the tamp was level and whether it was the same as last time. Consistency and levelness beat force, every time.
Release the pressure and lift the tamper straight up. Do not twist it on the way out. The puck surface should look flat and smooth, with no loose grounds scattered around the rim — wipe those away before locking in, because stray grounds end up pressed into the group head gasket and, eventually, in your cup.
The Optional Polish
You will see baristas give the tamper a small spin at the end of the press, a gesture called polishing. The idea is that it smooths the puck’s surface. Whether it actually improves anything in the cup is one of espresso’s cheerful unresolved debates; some swear by it, others call it pure theatre, and the evidence for a taste difference is thin. A gentle, light spin will not hurt anything. An aggressive grind into the puck can break the seal at the edge and undo everything you just did. If you polish, keep it to a whisper — or skip it entirely. A clean straight press and a straight release is a complete, correct tamp.
Common Mistakes Worth Unlearning
The classic error is the tilted tamp. One side of the puck ends up denser than the other, water favours the loose side, and the shot runs uneven. Check your puck from the side now and then — the eye catches a tilt the hand misses. The second classic is pressing harder to fix a shot that ran too fast. It feels logical, but flow rate is governed far more by grind size than by tamp pressure, and leaning into the tamper just tires your wrist. Grind finer instead.
Two smaller habits deserve attention. Do not tamp and then wander off — brew promptly, because a tamped puck left sitting starts absorbing moisture unevenly. And keep everything clean: oils build up on the tamper base and inside the basket, and a rancid film on either will show up in the cup long before you think to look for it.
Brew It While It’s Fresh
A finished tamp has a short shelf life. Lock the portafilter into the group head and start the shot right away, while the puck is at its most even and the machine at its most stable. Then watch the extraction — the colour, the flow, the way the stream lightens — and let the shot tell you whether the tamp did its job. When the tamp is right, troubleshooting a bad shot becomes a short list: grind, dose, freshness. When it is wrong, it can be anything, and you will chase your tail.
None of this takes talent. It takes a few dozen repetitions before the motion sinks into muscle memory, and then it takes nothing at all — your hands will do it while your mind is on the beans. That is the real payoff of tamping well: not a better single shot, but a technique so consistent it disappears, leaving you free to think about the coffee itself.
3 Comments